Labels


Showing posts with label Science. Show all posts

Sunday, 2 June 2019

DIY Kitchen Science Kit For Kids


Most of the items for this awesome DIY Kitchen Science Kit are probably already in your house!

Your children will enjoy many happy hours of scientific play with this kit.

We've had our kit for a few years and it's still popular with my 9-year-old.  It's suitable for preschool and up.

Some of these items are only to be used under supervision.  If I have younger children over to play I only put out the edible items.

Here are some concepts that kids can explore with this kit:
  • Chemical changes (making slimes... explosions...)
  • Acidity and alkalinity
  • Starch content
  • Density of different liquids

The whole point of this kit is to allow kids to be as independent as possible, and to encourage them to see themselves as scientists.

The only intervention I ever give is to guide them in asking good questions.  Sometimes I also give them some perishable items, like milk, apple and potato slices, or celery sticks.

If you want to leave this kit in a prominent place for your kids to discover, or even set up a permanent science zone in your house, I've got a free printable for that!  (No butterflies were harmed in the making of this sign.)


The DIY Kitchen Science Kit has two parts; the substances and the equipment.

1.  The substances


I bought a bunch of uniform jars and labelled them.  That's mainly so I can control how much of anything gets used, plus it just looks awesome!

I think I got my jars from the thrift store, but I've seen them in Kmart in the scrapbooking section (here).

I made sure to write DO NOT EAT on inedible items:  This site explains how to label and store chemicals safely.  Kids should never be left alone with those items, even if they're old enough to know not to eat experiments.  Err on the safe side!

Ingredients to fill the jars:
  • Sodium bicarbonate
  • Citric acid
  • Corn oil
  • Sodium chloride (salt)
  • Sugar
  • Vinegar
  • Gelatin
  • Cornflour
  • Distilled water
  • Food colouring mini bottles
  • Glucose syrup
  • Dish liquid - DO NOT EAT - both Fairy and Earth are good because each works better in certain situations (for example the reaction from detergent and salt works much better with Earth) 
  • Alka-Selzer tablets DO NOT EAT
  • Iodine DO NOT EAT
I also had some surplus bottles of banana, peppermint, rosewater and pandan essences so I added those for some super-aromatic fun!

2.  Equipment

We started out with just a few kitchen implements, but have gradually expanded.  You don't really need much.
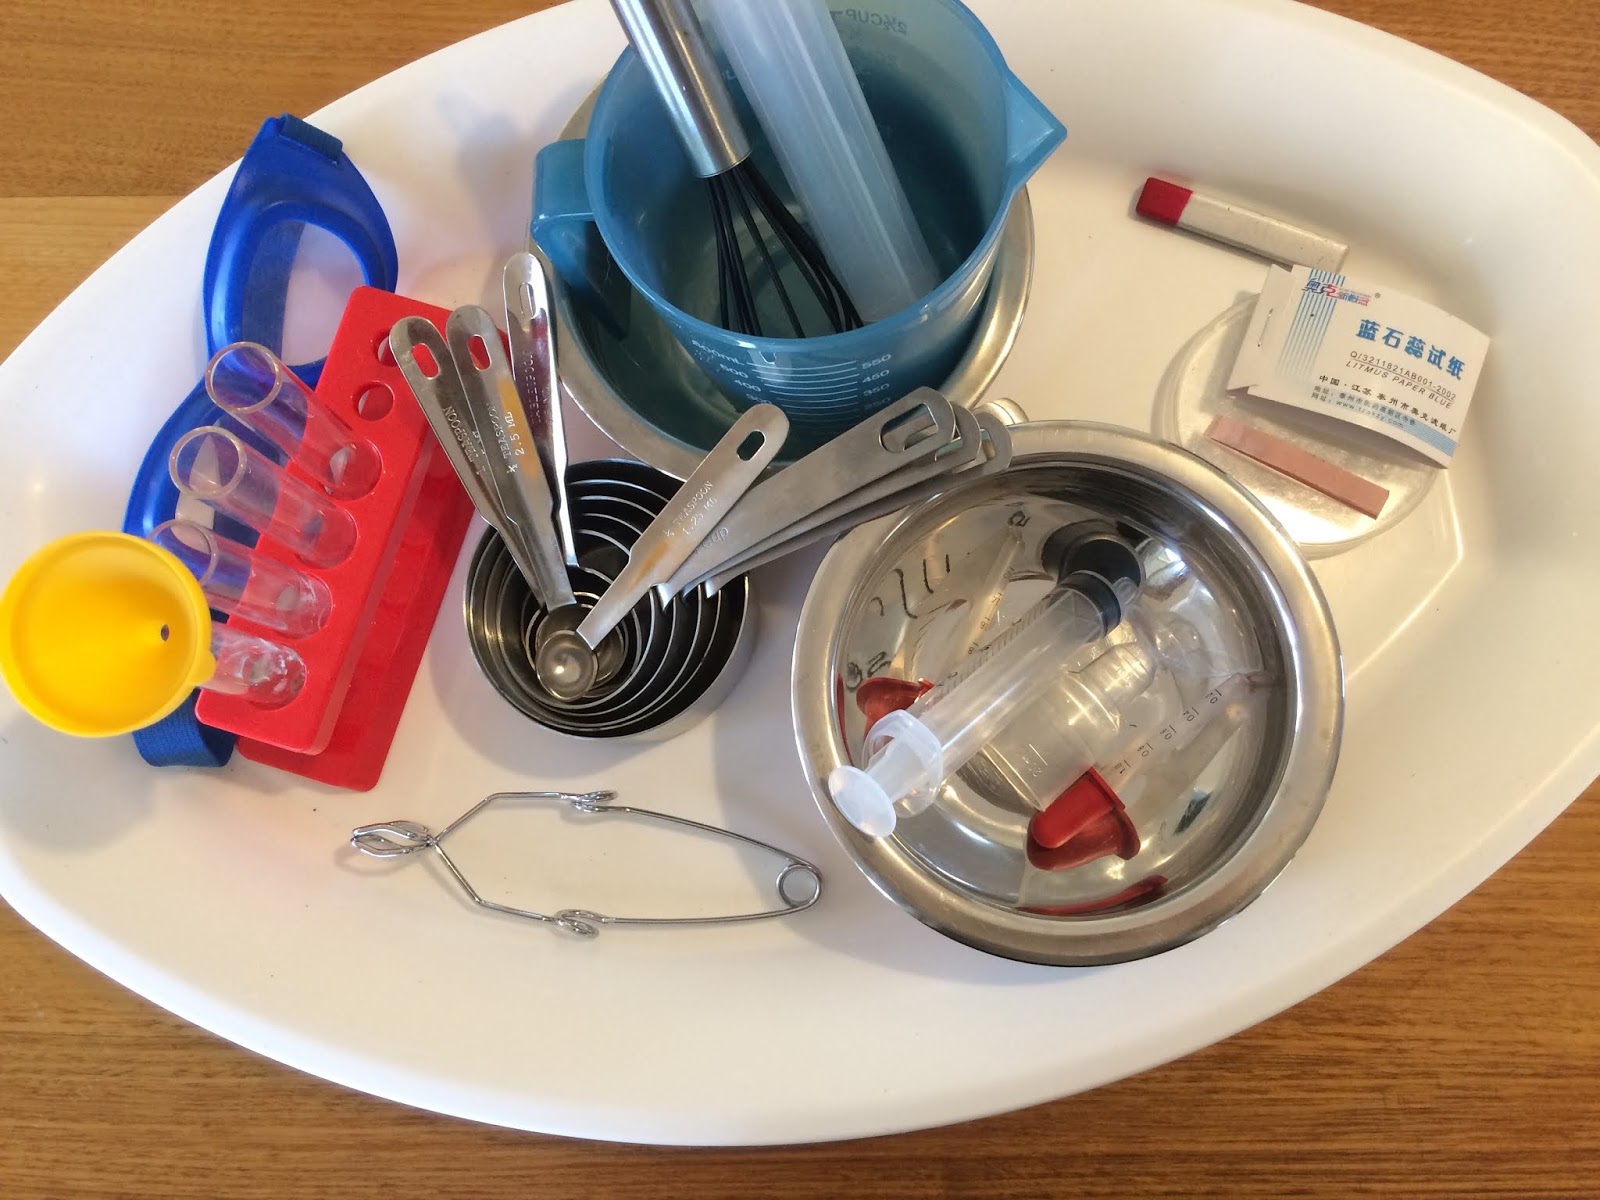
  • Clipboard and pencil for recording experiments
  • A couple of mixing bowls
  • Whisk
  • Measuring cups and spoons
  • Old medicine droppers and syringes
  • Blue and red litmus papers
  • Measuring jug
  • Goggles and lab coat - these instil good habits around lab safety and help fire up the imagination!
  • Nitrile gloves (iodine and food colouring stain hands)
  • Tray
  • Plastic table cover, and one for the floor if you need it - this is optional but it certainly makes clean-up easier... Science in our house can get MESSY!  We got ours from PJ's.
I ended up adding some test tubes, but you really don't need them.

Here's Roo investigating:


So that's a round-up of the substances and equipment in this awesome DIY Kitchen Science Kit.

I hope you get as many hours of fun out of it as we have!

Is there anything else you'd add?  I'd love to know in the comments!

Thanks for reading.  Interested in kitchen chemistry?  Try our Harry Potter Invitation or Sweet and Fat:  4 Easy Inquiries.


Tuesday, 14 May 2019

An Awesome Afterschooling Formula


Here's the simple and effective formula I follow for our home education adventures.  Let me outline the components, with three examples.

I'll give you an infographic first, for those who prefer to digest information in that way.  Then I'll go into more detail with 3 examples that you can try at home.


Using this formula, the learning really sticks.  Plus, it's fun!

Now, let me give you some awesome examples you can use.

THE HOOK

The main point of the hook is to get your child asking questions.

Sometimes I do more than one tuning in activity.

Hook Example 1:

The first example is a mystery; a 'Dr Dad for PM' sign appearing in the window of our house one day.


With an election coming up, and the Australian Curriculum requirement to cover Federation for my Grade 6 son, I had a vague idea that I wanted to take my kids to see Parliament sitting.

At this stage, I hadn't assessed their prior knowledge or come up with any firm learning intentions.

Remember, the hook doesn't have to do anything except get them interested!

Hook Example 2:

Again, I had no real idea of what the learning goals would be, but I knew I wanted to do a hands-on activity dissecting a sheep's heart.  I wasn't sure if my kids had any idea about veins, arteries or how hearts work.

The hook in this case was an interesting resource in the form of a fun lift-the-flap book on the circulatory system, which I put on display in our living room.


Hook Example 3: 

Sometimes the best hooks are simple open-ended questions, like when we drove past a tower and I asked, "What do you think this tower is for?" 

THE FIELD TRIP

A field trip takes the learning into the real world.

Before the field trip we usually discuss any questions we have that we want answered.  This is when I assess their prior knowledge and firm up learning goals.

It's a great Visible Learning strategy backed by research to be very explicit with your child at this stage about what they will learn, how they will learn it, and how they will know they have learnt it.

Field Trip Example 1:

The 'Dr Dad for PM' sign sent us off to see Parliament sitting, with the intention of learning what the different roles in Parliament are and who currently fills those roles.

Field Trip Example 2:

The book about the circulatory system took us to a medical museum with the intention of learning about the history of heart surgery.

Field Trip Example 3:

We visited a Shot Tower with the intention of learning when, how and why shot was produced in that way.

THE HANDS-ON ACTIVITY

This is a really, really essential component for me.  

The hands-on activity is less about knowledge, and more about creating a fun memory linked to the knowledge.  It really helps to develop a positive orientation towards learning.

Hands-On Example 1:

My son made this beautiful mace after seeing one on a poster we got at Parliament House:

Hands-On Example 2:

We dissected a heart after reading about the circulatory system:

Hands-On Example 3:

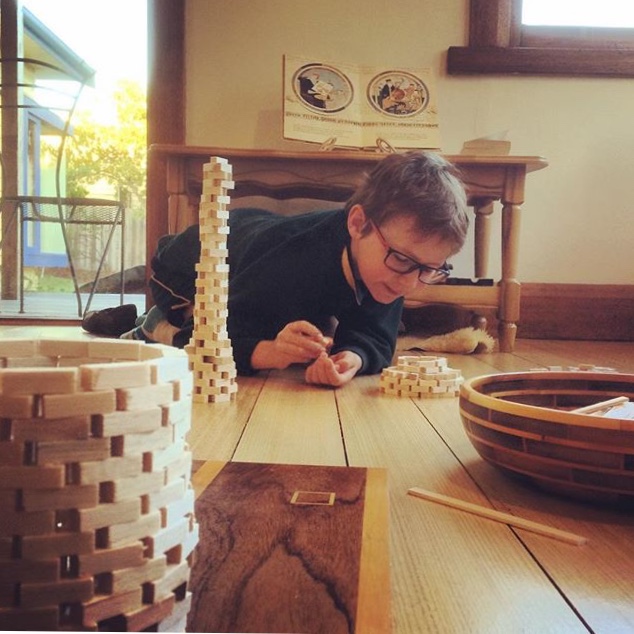
We built towers after visiting the Shot Tower.

I don't always do these components in order.  Sometimes the hands-on activity makes a really good hook, so we do that first.

If you want to see some examples of when I've used a hands-on activity as a hook, try our Cactus Invitation To Play or our Poo Provocation.

IN CONCLUSION

The three essential components of our afterschooling formula are a hook, a field trip and a hands-on activity.

Now it's your turn.  What do you think?  Please hit me up in the comments.

Stay tuned for another example of this formula in action with a post coming soon: 'This Is WAY Better Than Flashcards!'


Icky Gooey Poo!


Roo finished two workbooks!  Party time!


To celebrate, we decided to check out the new Pooseum.

Poo - it's something we have in common with all the amazing animals on this pretty blue planet.

Excretion is one of the seven processes of living things (Year 3, Australian Curriculum).

First, I set up an invitation to create animal scats using vanilla playdough, chocolate playdough and some mix-ins.

I laid out hay, grass, leaves, toy insects and broken pasta to represent bone fragments.

We used photos of animal droppings and a field guide to create some icky gooey scats.

To tune in before we went to the Pooseum, we did a bit of reading and brainstormed what we already knew about poo.


This ranged from the scientific (iron-rich faeces is dark in colour) to the historical (the Groom of the Stool was an important position) to the cultural (I often didn't use toilet paper when I lived in Indonesia).


At the Pooseum, there were fun worksheets to do, lots of books to browse and plenty of interactive flaps to lift.  I loved the touchscreen with different parts of animal bodies.

Roo loved the Pootube...


... especially the footage of penguins projectile pooping.  So bizarre!


The Pooseum was highly educational without being over-the-top gross.

Afterwards we went and bought 'possum poop' from the lolly shop down the road (liquorice bullets).  Mm-mmmm!  Coprophagic!

We had fun looking for scats in the wild using the PooFlip.  Roo has come a long way since the day he found a 'rock' for his slingshot which turned out to be a wombat dropping!


I now feel a great sense of affection for all the critters on our planet who have weird and wonderful toilet habits.

Do you have any favourite resources for learning about the seven processes of living things?  Please let us know in the comments.

Thanks for reading, and if you like the ideas you find here, please share using the buttons below!  New to the Afterschooling Blog?  Try our A-Z of Afterschooling.  For another provocation using playdough, try this Cactus Invitation To Play


Sunday, 20 May 2018

Harry Potter Chemistry (With Printable!)

While we were away overseas my youngest son Roo read the Harry Potter books and man, oh man, did he ever love them.  Well, who wouldn't?

That gave me an idea for some writing and chemistry activities, and I'm not talking about the chemistry between Ron Weasley and Hermione Granger!


Each night for a week I arranged 'potions' (actually kitchen chemical and physical changes) for Roo to discover when he got up in the mornings.

Sshhh, don't tell him it was chemistry!  Or that he's really learning how different materials can be combined for different purposes (Year 2, Australian Curriculum).

Here's an example of one I wrote (read on if you can't see the image on your device, and to find the actual substances used):


In case you can't read it, it says...

Confusing Concoction

In 'Harry Potter and the Prisoner of Azkaban', Harry has to brew this potion but he can't get it right.  

Try it yourself!

Harry's version:
Add golden dragon's blood to water (0.5 cup to 1.5 cups).
Add one troll eyeball.
Shake well.
Has it combined?

The Half-Blood Prince's version:
As above, but add a few drops of whomping willow sap as needed to cause the liquids to combine (emulsify).

Snape's mark:

And there's a space for him to write what mark he would give it.

You can get the printable for free here, or by clicking on the image above.

You need:

  • water 
  • oil 
  • dish liquid 
  • a gruesome toy eyeball or small ball

The dish liquid combines the oil and water because the dish liquid molecules are attracted to both oil and water.  Of course we discussed this after he made the potion.


Potions are also a great way to get kids into procedural writing and cooking.  Making potions is one of my kids' favourite things to do outdoors.


Look at the great writing Roo did!


And while we're on the subject of Harry Potter, we saw the most amazing thing in Lapland...


Expecto Patronum!

Do you know any chemical combinations which could be turned into fun Harry Potter potions?  Please let me know in the comments, as I'm starting to run out of ideas and I've got an 8-year-old begging for more potions!

If you liked this post, you might also like What On Earth Is WADD?!, or How To Make Someone Feel Special For A Year!

As always, thank you so much for visiting our blog.

Quest For The Best Bird Feeder


My son is learning about the needs of living things (Australian Curriculum, Year 1) so we've been creating bird feeders.


We tried a Cheerios bird feeder, but I was concerned Cheerios are not the most natural or healthy of foods for birds, so we took it down.  It only seemed to attract ants, anyway.


We also made a toilet roll feeder using peanut butter and wild seed mix.  It all washed off in the rain.


Next we tried an apple, still using peanut butter.


Finally we were able to eliminate the peanut butter altogether with this beauty made from a butternut pumpkin.


The pumpkin is definitely the model we'll use again.

UPDATE MARCH 2019:  Roo made a wooden bird feeder with his grandfather, which Dr Dad and S-Man mounted on an old boat boom in our backyard.  We use sunflower seeds and lorikeet nectar, both found at your local pet supply store.


Do you have any bird feeders in your garden?  What's the best model you have found?  Have you made any other design & technology creations? Please share with us in the comments!

If you liked this post, you might also like a tour of our STEM (Science, Technology, Engineering and Maths) Playroom.

Saturday, 19 May 2018

Cactus Invitation To Play

Cacti are such a fun way into learning more about the adaptations of living things (Australian Curriculum, Year 5).

I picked up a cacti colouring book for 50 cents from a bric-a-brac stall, which I used to create an invitation with scented playdough and loose parts.  I'm in denial that my boys are really too old for playdough now!


All you need is some green playdough, pictures of cacti (and some real cacti would be great, if you have them), toothpicks, and colourful items like pompoms or pipe cleaners.  One thing I didn't include, but wish I had, is a picture or diagram of a cactus WITH its roots.

We asked, Why do many cacti have spikes?  What are the adaptations of cacti that allow them to survive in their environment?  How long can they store water, and how do they do it?

Then we watched this video to answer our questions.

Annie The Destroyer (our dog) had a very sore mouth for a few days after eating most of my sons' prized cacti collection.  With some birthday money we bought some more and repotted those that survived to create this little succulent garden (out of doggie reach!).


When we were in Singapore we managed a quick trip to the magnificent succulent garden.  The Royal Botanical Gardens in Tasmania also has a great selection for a field trip closer to home.


This activity gave us a greater appreciation for the beautiful diversity of plants in the world (just like the wonderful diversity of humans!).

As the Italians say, il mondo è bello perché varia - the world is beautiful because it varies!

Do you have a favourite unusual plant?  Please share in the comments, we love making new botanical discoveries!

Thanks for visiting.  If you like this invitation to play, check out my Harry Potter Chemistry invitation!


Animal Features (And Who Are You Calling A Troglodyte?!)


Here are two classifying activities which encourage primary students to hone in on the structural features and adaptations of different animals that help them to survive in their environments.  (Year 5, Australian Curriculum)

The first is a classic animal sort activity using plastic toys from Kmart, but I also added photos of us and our dog to the mix (just to see if my sons could resist classifying each other as troglodytes).


My primary-aged kids are beyond simple land/water/air sorting so for this we used a chart from the Oxford Primary Illustrated Science Dictionary.


They didn't spend long on this activity, just enough time to figure out that all the insects in the bowl were arthropods.

For the second activity I selected some land and sea shells from our nature tray and challenged the boys to classify them using the Molluscs of Tasmania website.


Next we took a wonderful trip to Seahorse World, where we found out seahorses are tough little critters with both a spine and an exoskeleton!


As luck would have it, our friends invited us to the Brightside Farm Sanctuary (by appointment only) so we were able to investigate the features of camels and other fascinating rescue animals.


I'm not sure how much of what we learnt has stuck, but the boys certainly won't forget that 'benthic' means 'bottom-dwelling' (they thought that was hilarious).

Do you have any classifying activities to share?  Can you recommend any interesting field trips?  We'd love to know about it in the comments.

Thanks for reading.  If you liked this post about animal features, you might also like exploring the features of plants through this Cacti Invitation.  For another activity using shells, try Aboriginal-Inspired Shell Necklaces!


Friday, 19 May 2017

Rock Investigation + Easy DIY Dig-&-Discover


Do you want to grow children who know how to have FUN without the latest whizzbang trendy gadgets or expensive kits and boodles?

Hook your kids on rocks with this fun investigation!  I mean, heck, rocks are everywhere and they're totally free!  These activities will give your children a greater respect for the Earth.

Explore hardness using a DIY kit, plus make your own dig-and-discover activity.  Or if you can't be bothered with all that, try a fun family bonding activity that requires no resources.

This is not a whole geology unit, just an opportunity to observe different properties of rocks (Year 4, Australian Curriculum).

We used this fantastic Rock Observation Chart to investigate the following:
  • colour
  • texture
  • lustre
  • streak
  • hardness
  • size
  • magnetism  

For the DIY kit you need...
  • a nail
  • a coin 
  • smooth beach glass
  • a magnet 
  • a ruler 
  • and obviously some rocks to test!
This is a great kit for taking out in your Nature Backpacks!  Simply use the materials to test the properties of the rocks and record your findings on the sheet.

For the dig-and-discover kit, you need:
  • Clay 
  • Something to put inside, such as Lego, gum nuts, foreign coins...
  • A small hammer
  • Child-size safety glasses
  • dust mask
  • An old towel to contain the mess
  • A paintbrush
I used terracotta clay.  I kneaded a small Lego kit into it.   The bigger the lump, the longer the drying period.  Mine took about three weeks to harden completely, then I gave it to my son with the hammer, brush and safety gear.  It was my first attempt at a dig-and-discover activity and it was super successful!

If you want to see how I presented the materials and which books I used, please watch the video! Just be warned that the footage is low quality and it's very... um... wordy at the start.  I promise I've learnt my lesson about waffling!  (S-Man says, "Oh really, mum?!")

Finally, if you can't be bothered with the DIY kits, try our favourite family bonding rock activity: "Sedimentary rock"!  Yup, you guessed it, we all lie on top of each other like layers of rock :-)


As you'll see from the video, I scored a bucket of clay from four kilometres under the ocean.  Now the only question is, what shall we make with it?!  Please post your ideas in the comments!  Also, where are the best places to observe interesting rock formations?  If you know, please tell us!

Thanks for popping by!  If you're looking for more things to do with rocks, try our Aboriginal Story Stones!  For more Nature Study, check out our Unzoo Post (with Printable) or try making one of our Bird Feeder Suggestions.

Monday, 15 May 2017

Leaf Hunt Printable


I created an Autumn Leaf Hunt which I'm delighted to share with you for free here on TPT. (Australian Curriculum, Year 5: Features of living things.)

All trees in this hunt are common deciduous trees found on the lawn below the conservatory in the Tasmanian Botanical Gardens.  Late April or early May is the ideal time to complete the hunt.

If you're looking to identify local Tasmanian trees, I highly recommend the EucaFlip and TreeFlip available from the Botanical Gardens Shop or online (I am not affiliated with these products, just love them!).

So... pack your Nature Backpack and have some fun exploring the gardens!  And be sure to let us know in the comments if you used our Leaf Hunt and found all the trees.

Watch the video to see our adventure, and to find out who cops a faceful of leaves!


Thanks for reading.  You might like to check out our Rock Investigation with Instructions for a DIY Dig-&-Discover Kit!  New to the Afterschooling Blog?  Try the A-Z of Afterschooling.

A Trip To The Unzoo (With Printable!)


Are you in Hobart and looking for some good family fun?  If so, read on.  If not, skip to the end of the post for a video of some cute (and not-so-cute) Tasmanian animals! 

The Unzoo in Taranna (formerly the Devil Park) is a doable day trip from Hobart.

In order to get the most out of the Unzoo I have made up a brochure where your kids can tick off 6 animals as they see them.  You can get it free here on TPT, or by clicking on the images below.

This helps children identify the different external features of living things (Year 1, Australian Curriculum).


We enjoyed watching the devils being fed using a new bungee system.


The kids loved feeding the kangaroos.


An absolute highlight of the day was the bird show - don't miss it and bring a coin for a fun surprise!


We took a peaceful walk to the lagoon and played Yahzee on a picnic bench.

We highly recommend a trip to the Unzoo as a FUN family adventure and learning opportunity!

You might prefer to stay overnight on the Tasman Peninsula and enjoy some of the other local attractions, like Sommers Beach (a great family beach) or the Lavender Farm.

Here's a vlog of our day, with lots of footage of Tasmanian Devils for our overseas friends:


We visit the Unzoo on a regular basis and it has given us an immense love for the amazing animals and plants on our planet.

Please let us know in the comments if you use our printable!!

If you liked this post, you might also like our learning activities about Animal Features.